Hi Technojunkies,
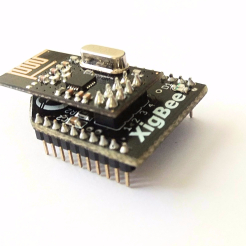
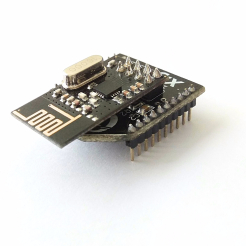
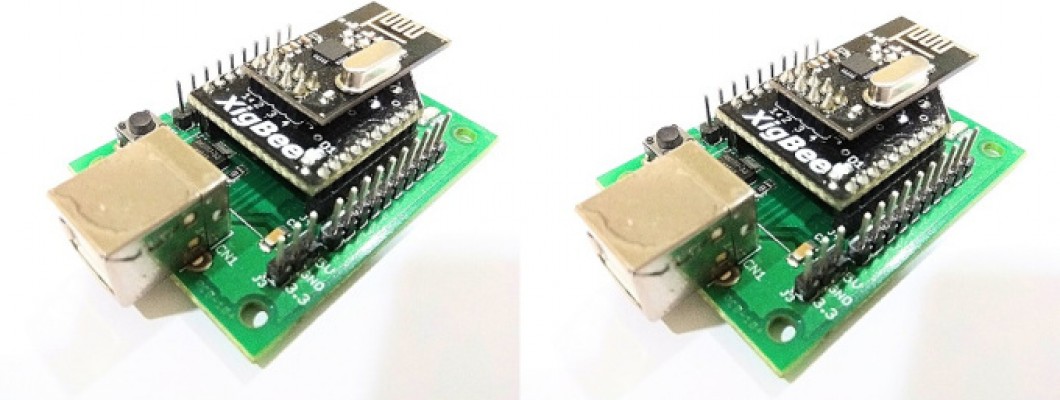
Elementz Engineers Guild introduces the NRF Xigbee for low cost and high speed wireless data communication using ZigBee protocol.
Module Description:
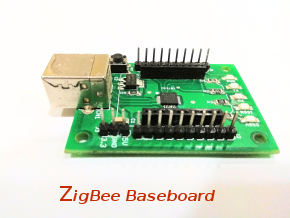
- Can be plugged into normal ZigBee base board.
- Supports AT commands to configure the system.
- Enables serial data transmission distance: 50 to 500 m.
- Single transmission efficacy: 1-70 bytes.
- Supports baud rates : 9600, 115200, 250000.
- VCC: 3.3V supply.
- Supports 3.3V logic voltage levels for Tx and Rx signals.
XigBee can also be configured in Normal as well as Broadcast communication mode (will be explained in the later part of this blog).
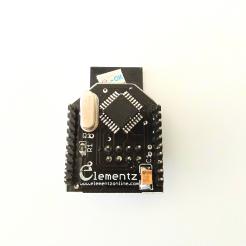

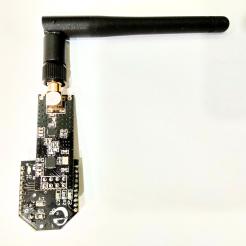
Also introducing XigBee Pro for Long range Communications:
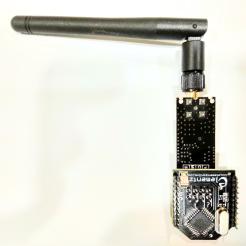
In this post, you will be directed through the steps involved in configuring NRF XigBee for wireless data acquisition,configuration modes and controls. The connections required and the AT commands aiding this capability will be entailed as well.
Hardware Prerequisite:
- XigBee with base board. It is readily available from our online Store. (You can use ZigBee baseboard itself ,if you have one).
- USB A to B cable.
- Serial to TTL or CP2102.(You can purchase it from our Store as well).
- Jumper wires.
Software Prerequisite:
- Arduino IDE 1.6.4 or its newer versions– (Download it from here).
- PuTTy-an open source terminal emulating software ,serial console.(You can download it from here).
In the first part of this post ,I can depict you the steps involved in configuring and setting addresses of a modular pair, so that data communication is alive between those two modules. In the latter part of the post, I can take you towards broadcast communication, which involves two or more than two XigBee communication.
Follow my lead carefully,
Part 1: Exclusive Setting of Addresses in a XigBee Pair
Step 1: Connect a USB A to B cable to the XigBee base board.
Step 2: Connect the A to B cable to the USB port of a computer and make sure that the port has been detected by checking the Device Manager option.( I am demonstrating using two XigBee modules in this part. The two modules are connected to different USB ports of the same computer).
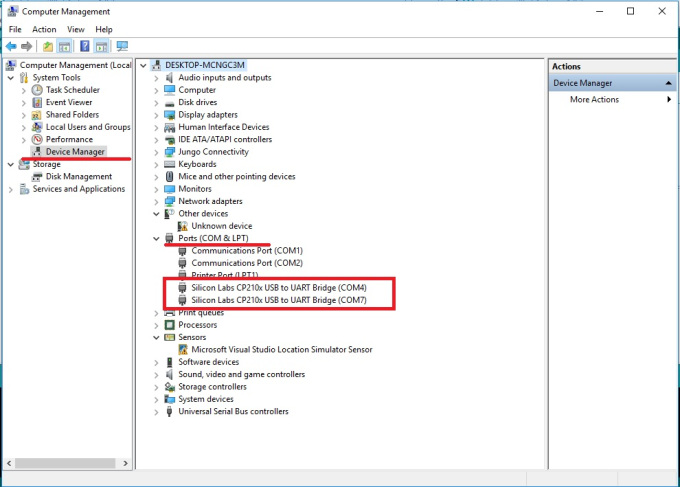 Figure 1: Ports in Device Manager
Step 3: Open two Arduino IDE windows. (You can easily observe from figure 1 that each module has been assigned with a different port number). Select those port numbers for each corresponding module.(Selecting port: Under Tools > Port in Arduino).
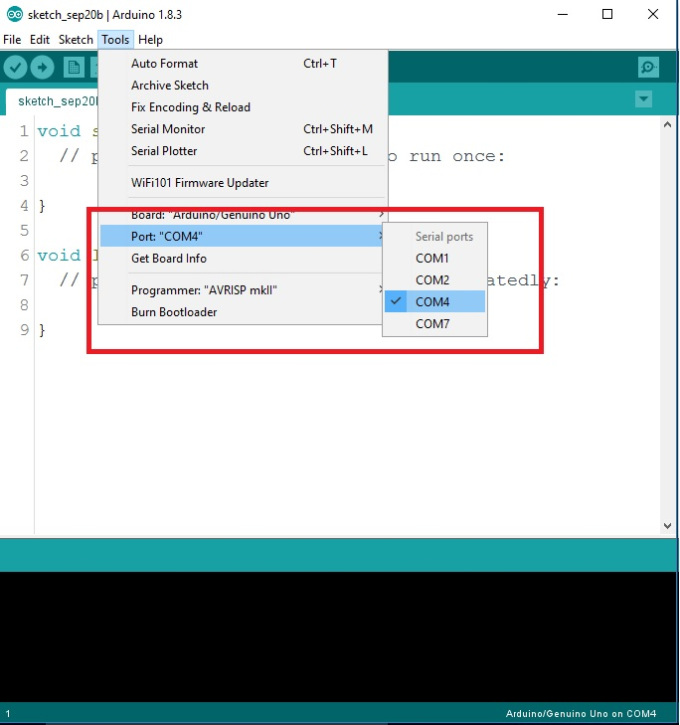
Figure 2: Port Selection in Arduino IDE
Step 4: Open Serial Monitor in both Arduino IDE.
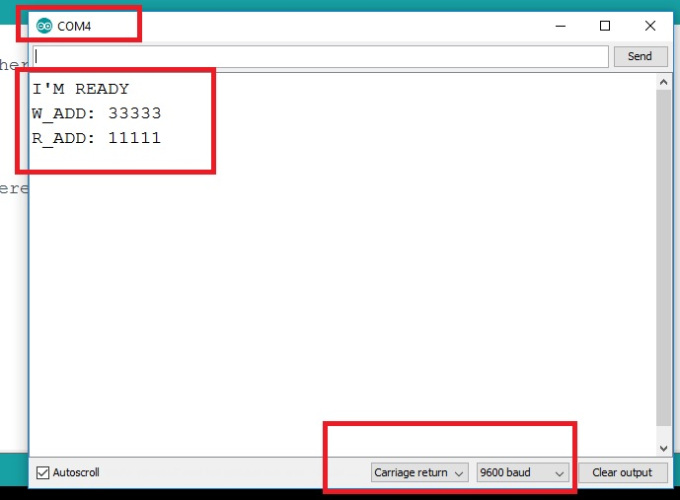
Figure 3: Serial Monitor
The default writing address and reading address are displayed on Serial Monitor followed by the module response “I’M READY”. This represents the normal operation mode of the module or simply known as normal mode.
Ensure to select the baud rate as 9600 and communicating type as Carriage return.
Step 5: To configure writing and reading addresses of each XigBee type ‘ *** ‘ on the input box of the Serial Monitor and click the Send button. This configures module's entry into config. mode.
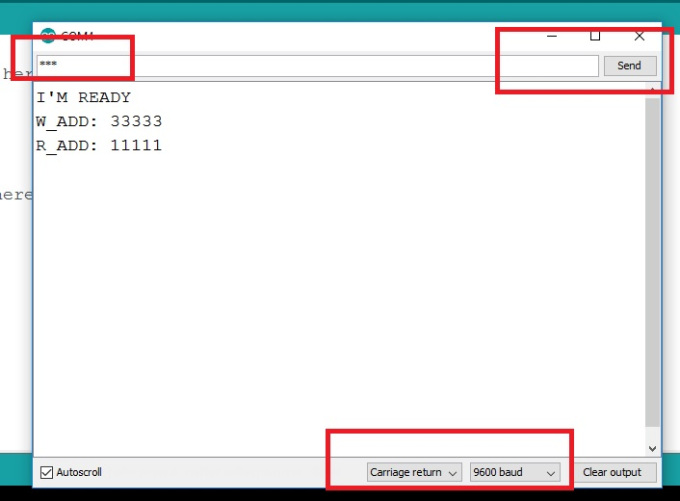
Figure 4: Config Mode
Step 6: Use AT commands to configure the writing & reading addresses. AT commands can also be used to set/change the Baud rate if required.
- Writing address: AT+WADD=’type any address‘ (eg: AT+WADD=ABCDE).
- Reading address: AT+RADD=’type any address‘ (eg: AT+RADD=FGHIJ).
- Baud Rate: AT+BAUD=’type any supporting baud rate’ (eg: AT+BAUD=115200).
- Restart the Module: AT+REBOOT in order to apply the changes.
Note:Ensure and make the writing address of one XigBee module as the reading address of another and vice versa for maintaining proper communication between the duo.
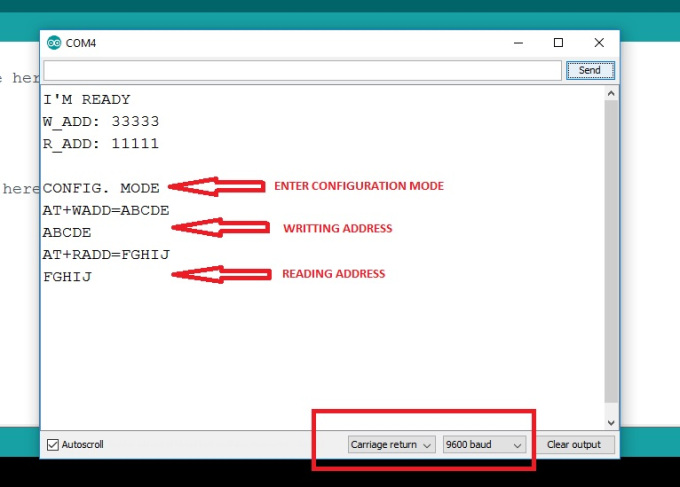
Figure 5: Address Changing in Config Mode
Step 7: After configuring the addresses , XigBee shall be restarted using AT command ‘AT+REBOOT’ in order to apply the changes, else the reconfiguration will be invalid.
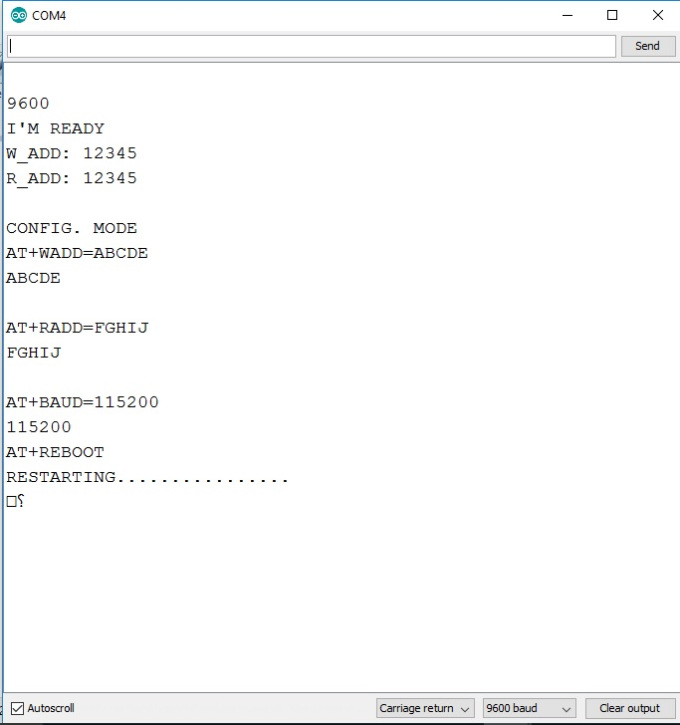
Figure 6: Rebooting XigBee
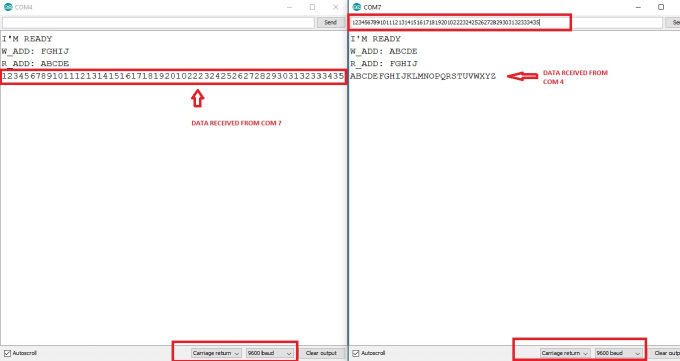
In order that two or more XigBees to communicate simultaneously substantiates the need for its re-configuration onto broadcast. Broadcast configuration facilitates an added advantage of communication between many modules.
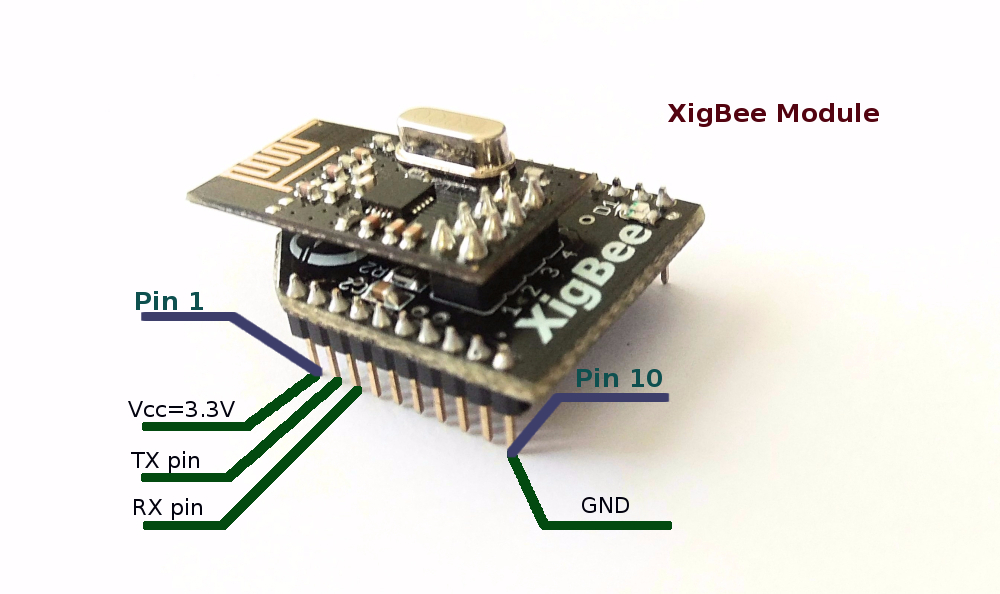
Figure 8: Pinout
Here, we can perform another way of interfacing XigBee module other than USB A to B cable, which is by using direct pin connections. So, the pins which are required are Vcc(pin 1),TX pin(pin 2), RX pin(pin 3), GND(pin 10). Use CP2102/ Serial to USB converter for serial data monitoring and configuring XigBees.(You can do the following steps even without baseboard if you are aware of pins used).
Pin Connections:
-
Connect XigBee Vcc with that of 3.3V of CP2102.
-
Connect XigBee GND with CP2102 GND.
-
Cross-connect TX pin of XigBee with RX pin of CP2102 and vice-versa.
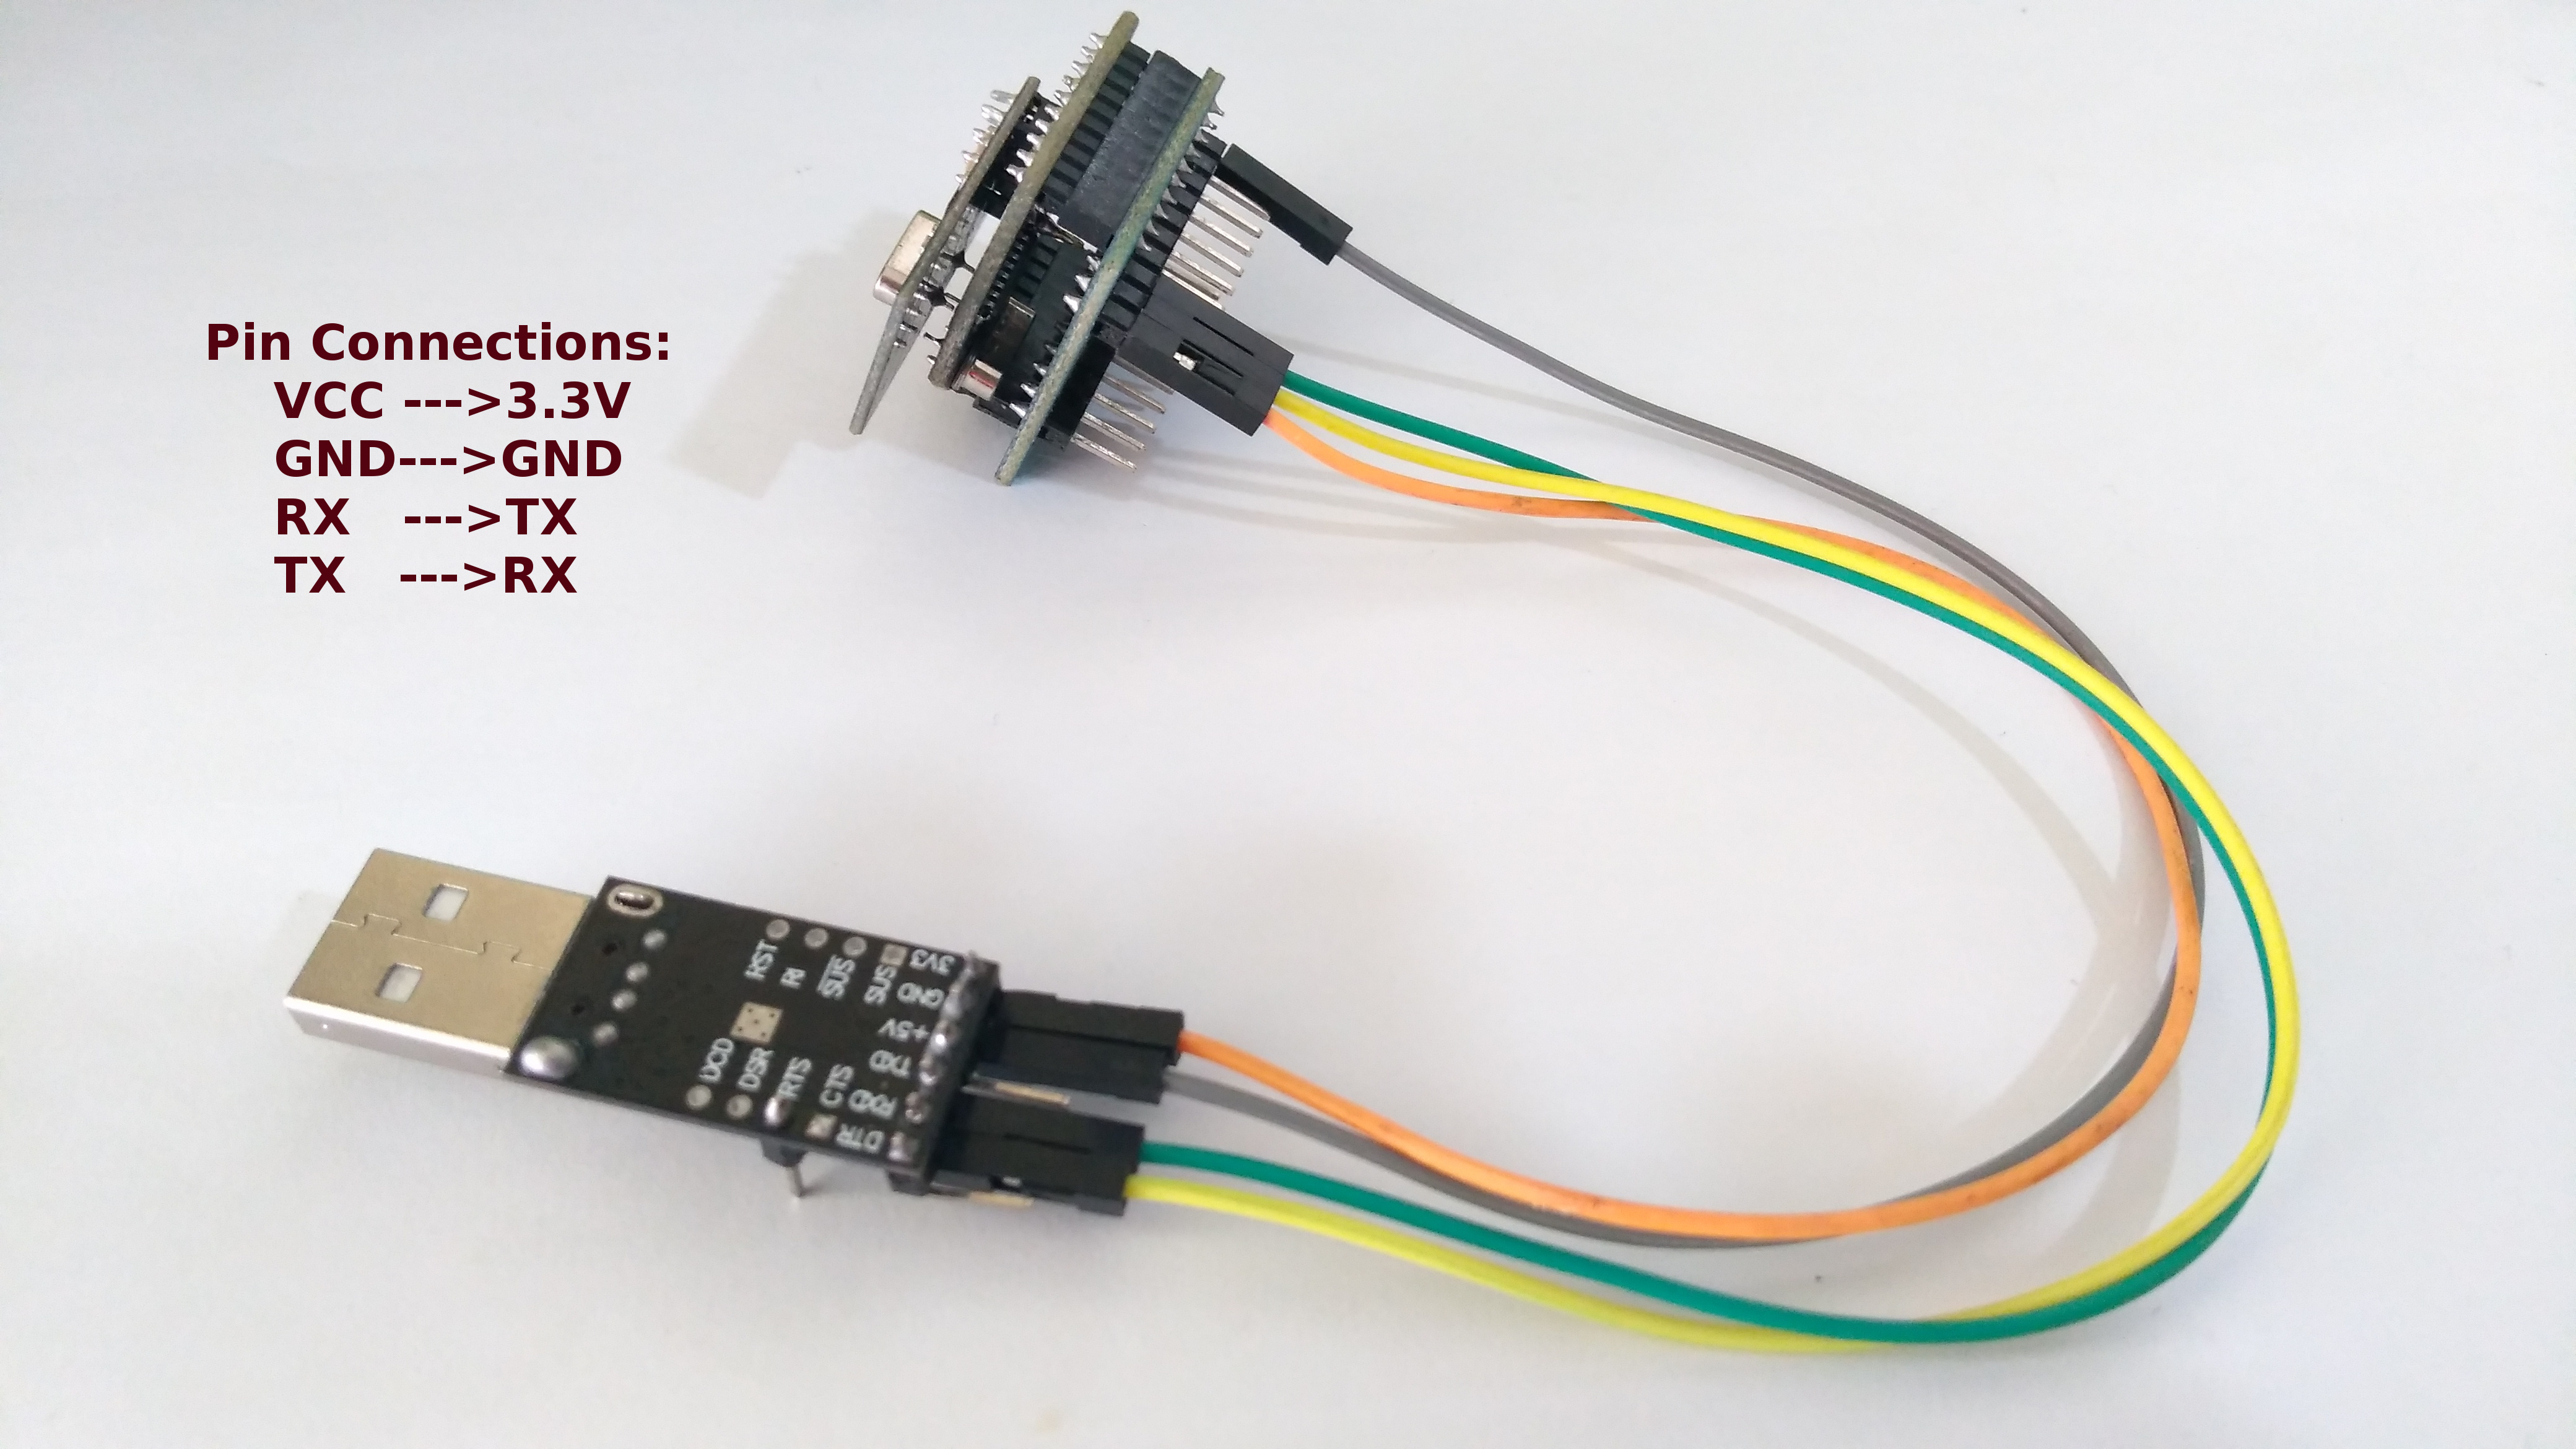
Figure 9: XigBee Pin Connections with CP2102
Follow these steps carefully for reconfiguration into broadcast,
Step 1:Connect XigBee with CP2102. Now, insert CP2102 onto USB port of PC. Open Putty. Select its Serial button. Specify the port number( it can be identified using device manager in windows OS). Specify supporting baud rate into which it is configured. Press Open button. (You can open two serial terminals simultaneously if two modules are connected).
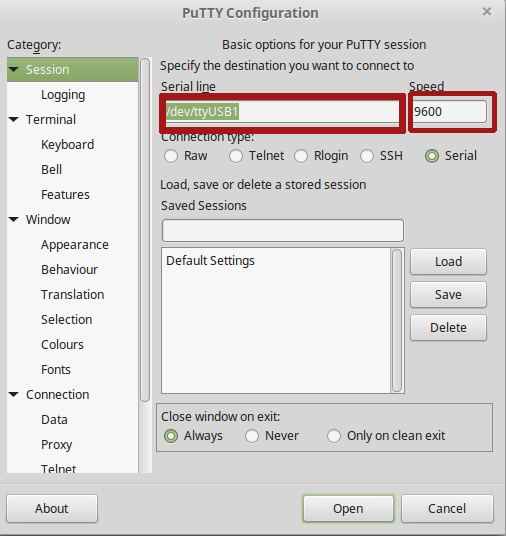
Figure 10: PuTTy
Step 2: To change address for broadcasting, enter into config mode( once the address has been set previously to restrict communication between two modules). To enter into config mode,use AT commands. Type "***" at a fast pace so that you can XigBee enters config mode displaying it as well.
Step 3: Make write address and read address same for all the modules. For example, if you are broadcasting using 3 modules ensure to make reading and writing address of all modules same.
Type AT+WADD=<type write address> eg:AT+WADD=12345 to change the write address.
Type AT+RADD=<type read address> eg: AT+RADD=12345 to change the read address same as write address.
Type AT+REBOOT to restart the module in order to apply the changes.
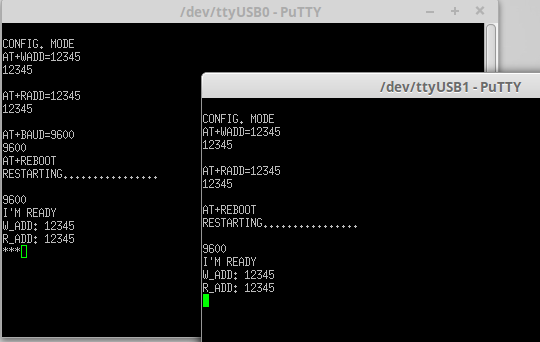
Figure 11: Configurin' to broadcast
Step 4: Now, you can broadcast your data via all the modules which have been set in this format. Here, I have set three modules which are now broadcasting data.
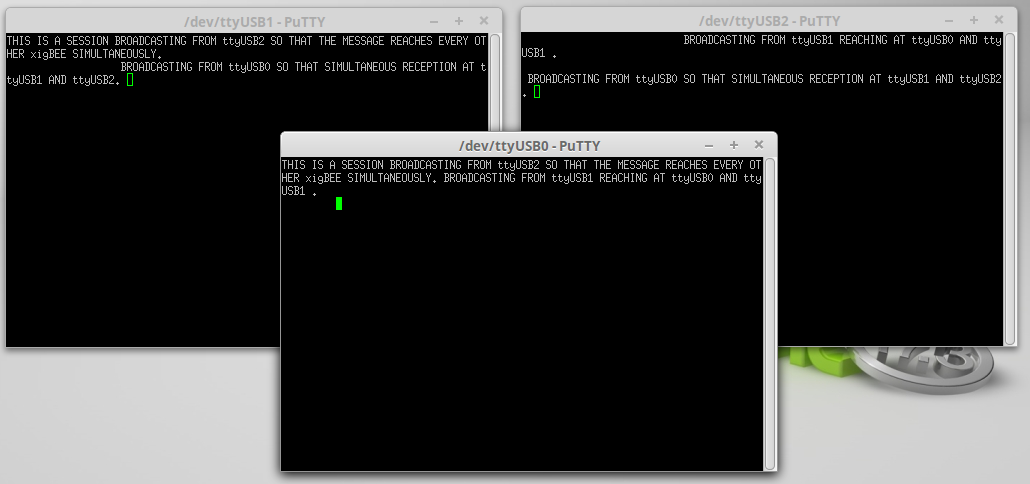
Figure 12: Broadcast Communication
Note:Factory Default configuration of XigBee is 9600 baud, Broadcasting mode.


